
BLOG
Padel Court Anchor Bolts: Cast-In vs Post-Installed Systems
Recent Articles
Table of Contents
Key points covered in this guide:
- What Padel Court Anchor Bolts do within the court structure
- How cast-in anchors compare with post-installed systems
- The differences between mechanical and adhesive anchors
- Why bolt diameter alone cannot determine anchorage capacity
- How concrete strength, edge distance, spacing, and embedment affect performance
- Why drilling, hole cleaning, levelling, and torque control matter
- Which corrosion-protection options suit indoor, outdoor, and coastal courts
- What buyers should request from the court supplier and foundation contractor
- How to inspect anchor bolts before steel, glass, and turf installation
Padel Court Anchor Bolts connect the steel court structure to its concrete foundation.
Although they are relatively small components, they help transfer wind loads, structural weight, player-related forces, fence loads, glass-support reactions, gate movement, and lighting-column forces into the concrete base.
An incorrectly selected or poorly installed anchor can contribute to loose base plates, leaning posts, cracked concrete, moving gates, damaged coatings, glass misalignment, and repeated maintenance.
The International Padel Federation defines a standard doubles court as 20 metres long and 10 metres wide internally. Its enclosure includes sections reaching 3 and 4 metres in height, so the supporting steel structure must remain accurately aligned and securely connected to the foundation. The current FIP rules define the playing enclosure but do not provide one universal anchor-bolt specification for every site.
Anchor design must therefore be completed according to the actual court structure, foundation geometry, wind conditions, concrete properties, local building requirements, and anchor manufacturer’s technical data.
What Are Padel Court Anchor Bolts?
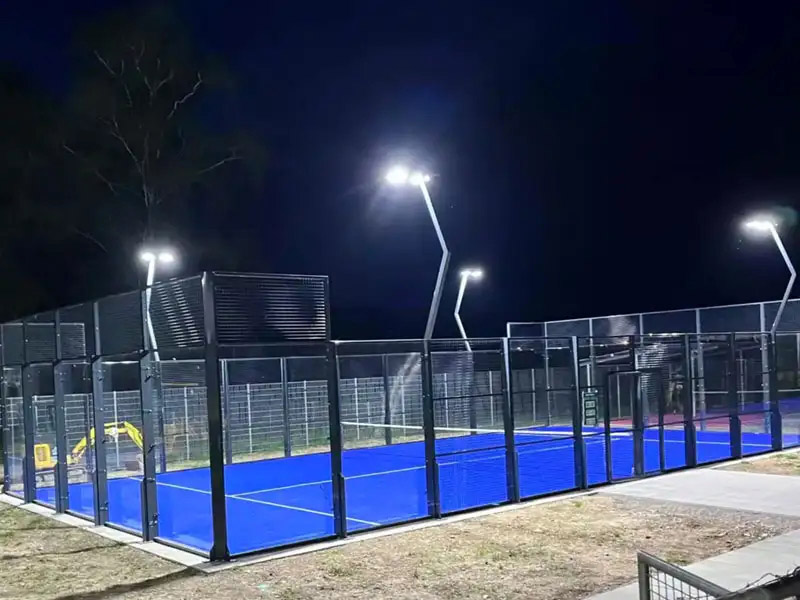
Padel Court Anchor Bolts are fasteners used to secure steel base plates, court posts, gate frames, lighting columns, roof columns, or structural rails to concrete.
A typical base connection may contain:
- Steel post
- Welded base plate
- Anchor bolts or threaded rods
- Nuts
- Washers
- Levelling shims or nuts
- Non-shrink grout
- Concrete foundation
- Reinforcing steel
- Protective coating or sealant
What Forces Do Anchor Bolts Resist?
Depending on the location, anchors may resist:
- Tension: forces trying to pull the bolt out of the concrete
- Shear: forces acting horizontally across the base plate
- Combined loading: tension and shear acting together
- Overturning moment: forces created when a tall post is pushed by wind
- Repeated loading: movement caused by doors, wind, vibration, or regular use
ACI CODE 318 includes requirements for mechanical and adhesive anchoring to concrete as part of its structural concrete provisions. Its scope covers strength, serviceability, durability, connections, construction documents, inspection, and structural anchorage.
Concept: Load Path
A load path is the route through which forces move from the court structure into the ground.
For a typical post, the path runs through the steel member, welds, base plate, bolts, concrete foundation, reinforcement, and supporting soil.
A strong bolt cannot compensate for a weak base plate, damaged concrete, poor weld, or undersized foundation.
Why Anchor Design Matters for Padel Courts
Padel courts contain relatively tall steel and glass enclosures.
The FIP rules specify 4-metre-high end enclosures and several permitted side-enclosure arrangements. The fencing, walls, gates, and glass must remain properly positioned to create a uniform and safe playing enclosure.
SRSC’s RR01 Panoramic Padel Court, for example, uses 100 × 100 × 3 mm galvanized-steel posts and eighteen 12 mm tempered-glass panels measuring 2 × 3 metres. These components create meaningful structural and wind demands that must be transferred through the base connections.
Wind Loads
Wind can act on:
- Glass panels
- Steel mesh
- Posts
- Lighting structures
- Advertising boards
- Roof coverings
- Windbreak screens
Solid or partially solid additions may significantly change the loads on the anchors.
Glass Alignment
Loose or uneven base connections can affect:
- Joint widths
- Glass-support alignment
- Bolt-hole positions
- Panel contact
- Door operation
- Ball rebound
Gate Movement
Repeated opening, closing, and user contact can gradually loosen an unsuitable gate-post connection.
Roofed Courts
A roof introduces additional:
- Dead load
- Wind uplift
- Horizontal load
- Overturning
- Rainwater load
- Snow load where applicable
Anchors for a roofed system should not be selected using the same assumptions as a standard open court.
Cast-In vs Post-Installed Padel Court Anchor Bolts
The two main approaches are cast-in anchorage and post-installed anchorage.
| Comparison Area | Cast-In Anchors | Post-Installed Anchors |
|---|---|---|
| Installation timing | Before concrete placement | After concrete has hardened |
| Position flexibility | Low after concrete is poured | Higher |
| Setting accuracy | Requires an accurate template | Based on the finished steel layout |
| Concrete drilling | Usually unnecessary | Required |
| Rebar conflicts | Avoided through early planning | Must be detected before drilling |
| Installation speed | Integrated with foundation work | Completed during court installation |
| Adjustment after errors | Difficult | More flexible |
| Quality-control focus | Template position and embedment | Drilling, cleaning, setting, and torque |
| Typical use | New engineered foundations | New or existing concrete bases |
| Main risk | Misplaced bolts | Incorrect drilling or installation |
Cast-In Anchor Bolts
Cast-in anchors are positioned before the concrete is poured.
They may use:
- L-shaped anchor rods
- Headed anchor rods
- Embedded plates
- Anchor cages
- Cast-in channels
- Threaded rods connected to reinforcement assemblies
Advantages of Cast-In Anchors
Cast-in systems can provide:
- Planned embedment
- Direct coordination with reinforcement
- Reduced concrete drilling
- Strong load-transfer options
- Suitable solutions for major posts and roof columns
Installation Templates
A steel or plywood template holds the rods in the required position during concrete placement.
The template should control:
- Bolt spacing
- Bolt projection
- Base-plate orientation
- Court centre lines
- Post alignment
- Finished elevation
Main Cast-In Risks
Common problems include:
- Bolts shifting during concrete placement
- Incorrect bolt spacing
- Insufficient exposed thread
- Excessive exposed thread
- Incorrect post orientation
- Concrete covering the threads
- Anchor groups positioned outside tolerance
Survey Before Concrete Placement
Before pouring, verify:
- Court dimensions
- Grid lines
- Foundation locations
- Anchor coordinates
- Bolt projection
- Reinforcement clearance
- Electrical conduits
- Drainage channels
Once the concrete has hardened, correcting a misplaced cast-in bolt can be expensive.
Post-Installed Anchor Bolts
Post-installed anchors are placed into drilled holes after the concrete reaches the condition required by the approved anchor system.
The main categories are:
- Mechanical expansion anchors
- Concrete screw anchors
- Undercut anchors
- Adhesive anchors with threaded rods
ACI CODE 355.2-24 establishes qualification requirements for post-installed mechanical anchors used in structural applications under static or seismic tension, shear, and combined loading. It covers products such as expansion, screw, and undercut anchors in cracked or uncracked concrete.
Advantages of Post-Installed Anchors
They allow installers to:
- Position holes from the actual base plate
- Compensate for reasonable site variation
- Install courts on existing concrete
- Replace incorrectly located anchor points
- Coordinate the final structure after surveying
Main Post-Installed Risks
Performance can be reduced by:
- Incorrect hole diameter
- Insufficient embedment
- Excessive edge proximity
- Damaged concrete
- Unclean holes
- Incorrect adhesive mixing
- Wrong setting torque
- Cutting reinforcement
- Loading the anchor too early
Mechanical vs Adhesive Anchors
Mechanical Anchors
Mechanical anchors create resistance through expansion, undercutting, thread engagement, or another physical connection with the concrete.
Common examples include:
- Wedge anchors
- Sleeve anchors
- Concrete screws
- Undercut anchors
Advantages
- Fast installation
- Immediate or rapid loading for selected products
- Straightforward visual identification
- No resin curing period
- Suitable for many standard connections
Considerations
Mechanical expansion can create local stress in the concrete.
The engineer must therefore consider:
- Edge distance
- Anchor spacing
- Concrete thickness
- Concrete cracking
- Embedment
- Installation torque
Hilti’s technical information for one qualified wedge-anchor range shows that minimum spacing and edge distance vary according to the anchor size and embedment depth. This illustrates why installers should not apply one generic spacing rule to every mechanical anchor.
Adhesive Anchors
Adhesive anchors use resin or mortar to bond a threaded rod to the drilled hole.
Advantages
- Flexible embedment options
- Reduced expansion force during installation
- Potential suitability near selected edges when properly designed
- Useful for retrofits
- Suitable for irregular anchor layouts
- Can accommodate threaded rods in different materials
Considerations
Adhesive performance depends on:
- Approved resin
- Concrete condition
- Hole diameter
- Hole depth
- Drilling method
- Cleaning procedure
- Installation temperature
- Resin mixing
- Curing time
- Threaded-rod material
Hilti’s adhesive-anchor technical information distinguishes between cracked and uncracked concrete, dry or damp conditions, manual or automatic hole cleaning, installation temperatures, and approved anchoring elements.
Mechanical vs Adhesive Anchor Comparison
| Decision Factor | Mechanical Anchor | Adhesive Anchor |
| Setting method | Expansion, screw, or undercut action | Bonded threaded rod |
| Loading time | Often relatively fast | Requires specified curing |
| Hole cleaning | Product-specific | Critical for most systems |
| Expansion force | May be present | Generally lower during setting |
| Installation temperature | Product-specific | Strong influence on curing |
| Wet-hole suitability | Product-specific | Must be specifically approved |
| Edge applications | Design-dependent | Design-dependent |
| Installer control | Torque and embedment | Cleaning, dosing, embedment, and curing |
| Removal | Product-dependent | Rod is normally bonded permanently |
| Best use | Efficient standard installation | Flexible or retrofit applications |
Neither system is automatically better. The engineer should select a qualified product that matches the actual concrete and loading conditions.
Concrete Foundation Requirements
Anchor performance depends on the concrete receiving the bolt.
Concrete Strength
The engineer should specify the required compressive strength.
Anchors should not be designed or installed based only on an assumption that all concrete slabs have the same strength.
Concrete Thickness
The base material must be thick enough to provide:
- Required embedment
- Clearance below the anchor
- Resistance to concrete breakout
- Suitable reinforcement cover
- Protection against drilling through the slab
Reinforcement
Reinforcement can help the foundation resist structural forces, but drilled anchors should not casually cut through reinforcing bars.
Anchor manufacturers’ technical guidance warns that drilling through reinforcement should be avoided unless the responsible design engineer has reviewed the condition.
Concrete Condition
Inspect for:
- Cracks
- Honeycombing
- Voids
- Weak edges
- Previous holes
- Surface delamination
- Water damage
- Insufficient curing
SRSC’s installation guidance places steel-frame anchoring after foundation preparation and concrete work, reinforcing the need to complete the base before erecting the court structure.
Edge Distance, Spacing, and Embedment
These three dimensions are central to anchor design.
Edge Distance
Edge distance is measured from the centre of the anchor to the nearest free concrete edge.
Insufficient edge distance can increase the risk of:
- Concrete splitting
- Edge breakout
- Reduced shear resistance
- Installation damage
- Cracks during tightening
Anchor Spacing
Anchor spacing is the centre-to-centre distance between adjacent bolts.
Closely spaced anchors can create overlapping concrete stress zones and reduce the effective strength of the anchor group.
Effective Embedment
Effective embedment is the depth over which the anchor transfers load into the concrete.
A longer bolt does not automatically provide greater effective embedment. The actual value depends on:
- Anchor type
- Hole depth
- Base-plate thickness
- Washer and nut
- Grout layer
- Approved setting depth
- Concrete thickness
No Universal Anchor Size
A Padel Court supplier should not state that one bolt diameter is suitable for all projects without considering:
- Post size
- Base-plate geometry
- Court type
- Wind
- Roof
- Glass
- Concrete
- Local code
- Anchor approval
Drill Holes Correctly
Post-installed anchor performance begins with the drilling process.
Confirm the Drilling Method
Depending on the approved anchor, the hole may be drilled using:
- Rotary hammer
- Hollow drill bit
- Diamond core drill
- Special anchor-setting tool
The drilling method affects the hole surface, geometry, dust, and anchor performance.
Hilti’s current engineering guidance notes that drilling method, cleaning method, hole condition, and torque approach must match the anchor specification so the installed performance reflects the design assumptions.
Mark the Hole Depth
Use:
- Drill stops
- Depth gauges
- Marked drill bits
- Approved installation tools
A shallow hole can prevent full embedment. An excessively deep hole may waste resin or affect installation control.
Keep the Drill Perpendicular
Angled drilling can cause:
- Misaligned bolts
- Base-plate interference
- Uneven washers
- Reduced edge clearance
- Difficult post levelling
Scan Before Drilling
Where practical, inspect for:
- Reinforcing bars
- Electrical conduits
- Drainage pipes
- Post-tensioning systems
- Previous anchors
Clean Anchor Holes Properly
Hole cleaning is particularly important for adhesive anchors.
Dust and drilling debris can prevent the resin from bonding correctly with the concrete surface.
A conventional adhesive-anchor procedure may require repeated blowing and brushing steps. Hilti reports that improper hole cleaning can significantly reduce anchor performance, while approved hollow-bit systems can clean the hole during drilling for selected anchor products.
Typical Manual Cleaning Process
The exact procedure must follow the selected product’s instructions, but it may include:
- Blow loose dust from the hole
- Brush with the specified diameter brush
- Blow again
- Repeat the required sequence
- Inspect the hole before injecting resin
Use the Correct Brush
A worn or undersized brush may not clean the hole wall properly.
Do Not Substitute the Procedure
Do not assume that:
- Water flushing is acceptable
- One air blow is enough
- Any brush size is suitable
- A vacuum alone is sufficient
- Cleaning is unnecessary because the hole looks clear
The approved instructions control the process.
Install Adhesive Anchors Correctly
Check Resin Condition
Before use, verify:
- Product name
- Batch number
- Expiry date
- Storage history
- Temperature
- Cartridge damage
- Approved threaded rod
Discard Initial Material
Many two-component systems require an initial amount to be discarded until the components are properly mixed.
Follow the product instructions rather than relying only on resin colour.
Inject From the Back
Filling from the back of the hole can reduce trapped air.
Insert the Rod With Rotation
The threaded rod is normally inserted using controlled rotational movement until it reaches the specified depth.
Respect Curing Time
Curing depends on temperature and product formulation.
Do not:
- Tighten the base plate early
- Install the steel post too soon
- Apply wind or structural load before curing
- Assume daytime and nighttime curing are identical
Level the Base Plates
Anchor bolts secure the structure, but the base plates must also sit at the correct position and elevation.
Levelling Methods
Depending on the approved detail, installers may use:
- Steel shims
- Levelling nuts
- Prepared grout pads
- Adjustable base systems
Check Post Verticality
Use suitable surveying equipment to verify:
- Longitudinal alignment
- Transverse alignment
- Post verticality
- Gate opening
- Glass-support position
- Mesh alignment
Fill the Base-Plate Gap
Where specified, non-shrink grout can support the space beneath the base plate and transfer compression into the foundation.
The grout should not be treated as a substitute for correct anchors or proper plate alignment.
Avoid Uncontrolled Plastic Packing
Temporary plastic pieces, timber, loose washers, or random construction debris should not remain as permanent structural levelling materials.
Apply the Correct Installation Torque
Torque creates the intended clamping or expansion condition for selected mechanical anchors.
Why Torque Matters
Under-tightening may result in:
- Loose base plates
- Reduced anchor setting
- Post movement
- Water entry beneath the plate
Over-tightening may result in:
- Damaged threads
- Excessive concrete stress
- Anchor yielding
- Cracked coatings
- Distorted base plates
Use a Calibrated Tool
The installer should use:
- Calibrated torque wrench
- Approved adaptive torque tool
- Correct socket
- Written torque schedule
Do Not Use One Torque for Every Bolt
Torque depends on the exact:
- Anchor product
- Diameter
- Embedment
- Concrete condition
- Manufacturer approval
- Installation method
The court supplier or structural engineer should provide a bolt schedule rather than relying on site experience alone.
Select Corrosion-Resistant Anchor Materials
Outdoor anchors are exposed to water, cleaning chemicals, condensation, fertilizer, coastal salt, and damaged coatings.
Common Material Options
Depending on the environment, the system may use:
- Zinc-plated carbon steel
- Hot-dip galvanized steel
- Mechanically galvanized steel
- Stainless steel
- Special corrosion-resistant alloys
Indoor vs Outdoor Anchors
Some standard zinc-plated anchor products are specifically listed for dry indoor conditions. Product environmental limitations should therefore be checked before the same fastener is used on an exposed outdoor court.
Coastal Projects
Coastal anchor selection should consider:
- Salt exposure
- Standing water
- Crevices below base plates
- Dissimilar metals
- Cleaning frequency
- Replacement access
- Concrete contamination
Protect Cut Threads
Installation damage can remove protective coatings from:
- Threads
- Nuts
- Washers
- Rod ends
- Base-plate holes
Approved touch-up or sealing procedures should be defined before handover.
Coordinate Anchor Bolts With Drainage
Base plates should not remain in areas where water collects.
Common Water Problems
- Downpipes discharging beside posts
- Flat concrete around base plates
- Turf trapping moisture
- Blocked drainage channels
- Grout forming a water pocket
- Open holes around anchor rods
Provide a Drainage Path
The civil design should direct water away from:
- Anchor groups
- Gate posts
- Lighting columns
- Electrical boxes
- Roof columns
Seal Without Trapping Water
Sealants may reduce water entry, but an unsuitable detail can also trap moisture beneath the base plate.
The complete corrosion and drainage detail should be coordinated by the project team.
Anchor Bolts for Existing Concrete Slabs
An existing slab should not automatically be assumed suitable for a new Padel Court.
Survey the Slab
Determine:
- Thickness
- Concrete strength
- Reinforcement
- Cracks
- Joints
- Previous repairs
- Edge distances
- Drainage slope
- Underground services
Review Construction Joints
Do not place anchor groups across uncontrolled joints without engineering review.
Test Existing Concrete
Depending on the project, evaluation may include:
- Document review
- Cover scanning
- Core testing
- Rebound testing
- Pull testing
- Trial anchor installation
Local Thickening
If the slab cannot resist the court loads, the project may require:
- Perimeter concrete beams
- Isolated footings
- New reinforced strip foundations
- Local slab thickening
- Complete replacement
Post-installed anchors cannot make inadequate concrete structurally sufficient.
Anchor Bolts for Roofed Padel Courts
Roofed courts require a separate anchorage review.
Additional Design Inputs
Provide:
- Roof dimensions
- Column locations
- Structure height
- Roof material
- Wind uplift reactions
- Horizontal reactions
- Snow loads where applicable
- Gutter and downpipe positions
SRSC’s roofed court uses additional galvanized roof members over the standard 20 × 10 metre court, illustrating the larger structural package that must be transferred into the foundation.
Do Not Add a Roof Without Rechecking the Anchors
Anchors designed for an open court may not resist:
- Roof uplift
- Increased overturning
- Larger horizontal forces
- Additional column reactions
Padel Court Anchor Installation Process
Step 1: Review Approved Drawings
Confirm the latest:
- Court layout
- Foundation plan
- Anchor schedule
- Base-plate drawing
- Electrical layout
- Drainage plan
Step 2: Survey the Foundation
Verify:
- Dimensions
- Levels
- Concrete condition
- Anchor zones
- Court centre line
- Finished-floor elevation
Step 3: Position the Steel Base Plates
Mark each plate according to the approved structural grid.
Step 4: Scan and Drill
Check for reinforcement and services, then use the specified drilling method.
Step 5: Clean the Holes
Follow the exact anchor instructions.
Step 6: Install the Anchors
Control:
- Embedment
- Orientation
- Adhesive dosing
- Curing
- Nut and washer assembly
Step 7: Erect and Level the Posts
Check verticality and alignment before final tightening.
Step 8: Apply the Required Torque
Record the completed torque for every anchor group where required.
Step 9: Grout the Base Plates
Install approved grout after alignment and anchor acceptance.
Step 10: Complete Final Inspection
Only continue with glass, mesh, gates, lighting, and turf after the supporting structure has been accepted.
Anchor-Bolt Inspection Checklist
| Inspection Item | What to Verify |
| Anchor product | Matches approved schedule |
| Material | Correct corrosion class |
| Diameter | Matches drawing |
| Embedment | Meets approved requirement |
| Edge distance | Within approved design |
| Spacing | Matches base plate and calculation |
| Hole diameter | Correct drill bit used |
| Hole cleaning | Recorded and completed |
| Resin | Correct batch and within expiry |
| Curing | Required time completed |
| Nuts and washers | Correct grade and material |
| Torque | Applied with calibrated tool |
| Base plate | Level and fully supported |
| Post | Vertical and correctly aligned |
| Concrete | No unacceptable cracking |
| Coating | Installation damage repaired |
| Drainage | No water pocket around connection |
| Documentation | Photos and inspection records complete |
Information Buyers Should Request
A professional court package should include:
- Anchor-bolt layout
- Base-plate drawings
- Foundation reactions
- Concrete requirements
- Anchor specification
- Bolt material and finish
- Effective embedment
- Minimum edge distances
- Installation torque
- Adhesive curing requirements
- Grout specification
- Corrosion-repair instructions
- Inspection checklist
Clarify Responsibility
The contract should define whether anchor design is provided by:
- Padel Court manufacturer
- Local structural engineer
- Foundation contractor
- Anchor manufacturer
- Installation contractor
One party should be responsible for confirming that all information is coordinated.
Common Padel Court Anchor Bolt Mistakes
Selecting Bolts Only by Diameter
Bolt diameter does not define concrete capacity, embedment, edge distance, or corrosion resistance.
Drilling Before Reviewing Reinforcement
This can damage the structural foundation or force anchors into unsuitable positions.
Ignoring Hole Cleaning
Dust can seriously affect bonded-anchor performance.
Installing Close to the Concrete Edge
Insufficient edge distance can cause splitting or breakout.
Tightening With an Impact Wrench Without Control
Uncontrolled torque can damage the bolt, plate, or concrete.
Loading Adhesive Anchors Too Early
Resin must complete the specified curing period.
Using Indoor Zinc-Plated Anchors Outdoors
The selected material must match the exposure environment.
Leaving Base Plates Unsupported
A plate resting only on small points can deform or transfer loads unevenly.
Drilling Through Turf and Finished Surfaces
Anchors should be coordinated before turf installation whenever possible.
Adding Windscreens Without Structural Review
Windscreens and advertising panels can increase wind forces on the posts and anchors.
Conclusion
Padel Court Anchor Bolts are a critical part of the structural load path connecting the steel enclosure to the concrete foundation.
The correct solution may use cast-in rods, mechanical anchors, adhesive anchors, or a combination of connection systems. Selection should be based on structural loads, concrete condition, edge distance, anchor spacing, effective embedment, court type, environmental exposure, and local requirements.
Installation quality is equally important. Drilling method, reinforcement scanning, hole cleaning, adhesive dosing, curing time, post alignment, base-plate support, torque control, grouting, drainage, and corrosion protection all influence the completed connection.
Before production or installation, buyers should request approved foundation drawings, anchor layouts, base-plate details, material grades, installation procedures, torque requirements, and inspection records.
SRSC supplies panoramic, super panoramic, classic, single, and roofed Padel Court systems using galvanized-steel structures, tempered glass, steel mesh, artificial turf, and lighting. Buyers can review the complete Padel Court range, compare the RR01 Panoramic Padel Court with the RR03 Classic Padel Court, read the Step-by-Step Padel Court Installation Guide, or contact SRSC with the site location, court model, concrete information, wind conditions, and foundation drawings.
FAQ
What size anchor bolts are used for a Padel Court?
There is no universal size. The diameter and embedment depend on the court structure, base plate, concrete, wind, edge distance, roof, and local engineering requirements.
Are cast-in or post-installed anchors better?
Cast-in anchors are strong options for accurately coordinated new foundations. Post-installed anchors provide greater positioning flexibility and can be used on suitable existing concrete.
Can wedge anchors be used for a Padel Court?
Qualified wedge anchors may be suitable when the structural design, concrete, embedment, edge distances, spacing, environment, and installation all match the product approval.
Are chemical anchors stronger than mechanical anchors?
Not automatically. Both systems can provide strong structural connections when correctly selected and installed. Their suitability depends on the specific application.
How deep should Padel Court Anchor Bolts be embedded?
Effective embedment must be specified by the engineer and approved anchor data. It cannot be determined only from bolt length.
Can anchors be installed in cracked concrete?
Selected qualified anchors are approved for cracked concrete. The exact product and design category must be verified.
Should anchor holes be cleaned?
Yes, when required by the approved installation instructions. Hole cleaning is particularly important for conventional adhesive-anchor systems.
Can a Padel Court be anchored to an existing slab?
Possibly, but slab thickness, strength, reinforcement, cracks, edges, joints, and loads must first be evaluated.
Do roofed courts need different anchor bolts?
They normally require a separate structural design because the roof introduces additional dead load, wind uplift, horizontal forces, and overturning.
How should anchor bolts be protected near the sea?
The project should select a suitable corrosion-resistant material and address drainage, crevices, dissimilar metals, cleaning, sealing, and coating repairs.